Printing Tips and Tricks

When I do installations and training, I teach that if your resin tray is cloudy after you’ve cleaned it, you haven’t cleaned it well
enough.
My name is John Stancell, I work for AvaDent as the installer, trainer, and technical support for the NextDent 5100 printer.
I’ve done tens of installations in the US since the printer released last fall.
Coming up on the anniversary of continuous use on our first tray on our first printer with well over 1000 prints and still going strong, with 6 different technicians using the printer daily, I thought I’d share a couple things you can do to help keep your tray clean, which will increase the quality of your prints and help your tray last as long as possible.
Disclaimer: This is what I do and train my users to do and is supplementary to the official method instructed by 3D Systems, not officially endorsed by them.
1. Get a rubber spatula
This will allow you to mix more evenly, thoroughly, and even apply more pressure without the risk of puncturing or tearing the membrane.
Sorry, NextDent. Toss that rigid plastic thing as soon as you unbox it.
2. Mix the resin in the tray OUT of the printer
between prints and before you start printing for the day using the rubber spatula you just bought from tip #1. This again will allow you to mix more evenly, thoroughly, and apply more pressure, which will help you lift the material settled on the bottom of the tray. We use a computer mouse pad with a paper towel on it. This takes the tension off the tray and puts something with a little give between the tray and whatever surface you’re mixing on to minimize friction on the membrane. When you’re mixing, you should be able to clearly see through the membrane and whatever is underneath it. Using a black mouse pad under the membrane while mixing will help you know how well you’re reincorporating the resin that has settled to the bottom.
3. Don’t leave resin in the tray
longer than a day, especially heavily pigmented resins like MFH. If resin has sat in your tray longer than a day, throw it away and start over with a clean batch. The longer your resin sits in the tray, the harder it will be to clean.
4. Let alcohol do the work
when cleaning the tray. Pour some 99% IPA in the tray and walk away. Let it set for 10 minutes, using the paint brush every few minutes to incorporate the alcohol into the resin along the bottom and in the corners. Wipe, dump, wipe, rinse, wipe, repeat.
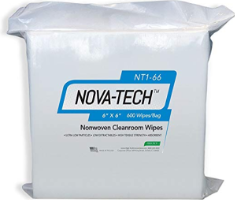
5. Clean Room Wipes
Do the majority of the cleaning with paper towels but get some of these for detailing the tray. They are lint and static free. Once you have the tray mostly clean put a small amount of IPA on the membrane and use one of these wipes to wipe with firm pressure to the membrane against the mouse pad. This will remove any final smudges and cloudiness.
Here are the ones we use: https://amzn.to/31Uyx7g

